How to Make the Best Gluten Free Bread
This post contains affiliate links. See my full disclosure HERE.
When I started my gluten free diet about 14 years ago, I was looking for a bread that was the closest to what I ate before avoiding gluten! I went through a lot of dry things! 🙂 Then I found one with pretty decent ingredients, but the price was speaking for the quality! 😀 Finally I gave in and I bought a bread making machine and I started to play around with recipes. I started to learn which flours complimented each other for flavor and texture.

That’s when I ended up with this gluten-free bread recipe. The bread this recipe makes is so moist but still fluffy and not too dense. It doesn’t fall apart or crumble like some gluten free breads do. It is also easy to make. My whole family and I really enjoy this bread!
I like to use this recipe to make gluten-free bread for sandwiches or toast. You can leave this bread out for about 24 hours. After that, to preserve the moisture and taste, I like to slice the bread and put it in to the freezer for up to 4 months. With gluten free bread, it is better to freeze it in order to preserve the texture of the bread.
Best Flour for the Best Gluten-Free Bread
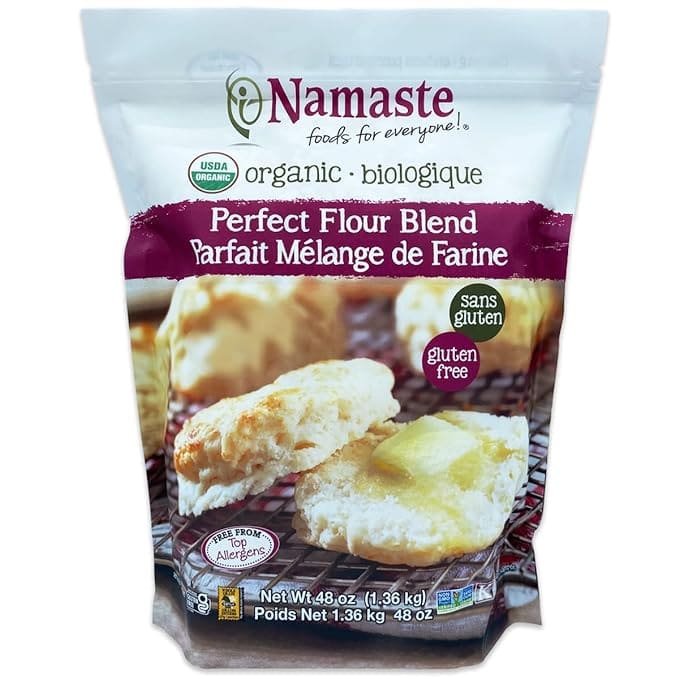
I used three types of flour for this recipe – Namaste Gluten Free Flour Blend, Almond Flour, and Tapioca Flour.
I like to use the Namaste Flour but because of the mild nutty taste that it has, I like to use the tapioca flour because it is more bland in taste. I use the almond flour to fluff it up a little bit and to balance out the bread. The tapioca flour makes the bread moist, but also makes it dense. The combination of these flours equals the bread out and makes it really delicious with all the things you want in bread – moist, fluffy, and a good taste.
Best Sweetener
For sweeteners, I have tried this recipe with maple syrup which you can do, but I like the honey more. The honey is better because it makes the bread more brown and crispy on the outside because it burns easier, giving the bread a great crust.
Gluten Free Bread Recipe Details
There are two parts to this recipe. One part is the dry ingredients and one part is the wet ingredients. We are giong to start by making the wet ingredients. This is very important because this is the order it will go in to the bread making machine. The bread maker I have is discontinued. However, I found this one on Amazon with great reviews.
To make this bread, start with warming the water a little bit on the stovetop. It’s important to have warm water, not hot, just warm water. My water is coming from the fridge water cleaning system so it’s super cold. It has to be warm so the yeast can work.
")
Next, you will measure out your liquid ingredients and stir together your eggs.

Once you mix your wet ingredients together, pour them in to the bread making bowl. In another medium size mixing bowl, mix together all of the dry ingredients except for the yeast.

You can get creative and add herbs. I added green onions and rosemary to this loaf. Fresh herbs make the bread different and very delicious!

Now, add your dry ingredients on top of the wet ingredients in the bread making bowl. Make a little nest in the top of the dry ingredients and add the yeast.
Start the bread maker and use the gluten free setting – this is very important!

Once the bread has cooled, cut it into slices. I like to slice my bread with my cutting machine. This is not necessary, but it makes 12 perfect slices. I like this one from Amazon.

I love keeping the bread in this bread box because then my boys can take the bread when they are hungry and it keeps the bread fresh. I also love the look of this cute breadbox! It is from Amazon and you can find it HERE.

This bread stays fresh for about 24 hours (it is usually gone in our house after that time), but to keep it for longer, it is best to freeze gluten free bread past 24 hours.

I will have recipes for sandwiches on the way but until then, check out my favorite gluten free pizza recipe! We love making these pizzas for a fun Friday night.

I hope you enjoy this bread as much as my family does! I would love to know what you think in the comments, and if you add any other herbs that make it delicious!
Watch me make the best gluten-free bread:

The Best Gluten Free Bread
A delicious and moist gluten free bread. The best in our opinion!
Ingredients
Wet Ingredients
- 1.5 Cups Water
- 1/4 Cup Ghee (ghee is a clarified butter but you can opt for any oil that you like)
- 1.4 Cup Honey
- 1 teaspoon Apple Cider Vinegar
- 3 Eggs
Dry Ingredients
- 2 Cups Namaste Gluten Free Perfect Flour Blend
- 1/2 Cup Almond Flour
- 1/2 Cup Tapioca Flour
- 1.5 teaspoons Xanthan Gum
- 1 teaspoon Salt
- 2 teaspoons Dry Active Yeast
Instructions
- To begin this bread, warm up the 1.5 Cups Water on the stovetop. You want the water just a little warm, not hot, just warm for the yeast to work. Then, add the remaining wet ingredients in the order that they are listed: 1/4 Cup Ghee, 1/4 Cup Honey, 1 teaspoon Apple Cider Vinegar. Mix these together really well. Add your 3 mixed Eggs and stir all wet ingredients together. Pour the wet ingredients in to your bread machine bowl.
- Then add all the dry ingredients except for the yeast on top of the wet ingredients: 2 Cups Namaste Gluten Free Flour, 1/2 Cup Almond Flour, 1/2 Cup Tapioca Flour, 1.5 teaspoons Salt, 1.5 teaspoons Xanthan Gum.
- Make a little well or nest in the middle of your dough. In this nest, put your 2 teaspoons Active Dry Yeast. Do not mix this in, just leave it in the nest.
- Set your bread machine to the gluten free setting and let it bake. Once it's done, let it cool before slicing. Enjoy!
Recommended Products
As an Amazon Associate and member of other affiliate programs, I earn from qualifying purchases.
Can this recipe be made with instant yeast? If so, are there any adjustments that need to be made?
Dear Noemi,
I have a question about the cup.
I baked the bread, unfortunately it was too moist and not edible. You told me a cup is 236 ml. Flour is heavier and I did the conversion and one cup of flour is 140 grams. Was that wrong? A cup of flour is also 236 grams. Thanks for an info. I would like to try the bread again.
Regards
Iris
I don’t have a bread maker machine. Would you recommend I mix the yeast & water mixture and then add the dry to it? Also what oven temperature to bake, & the baking time. Thank you for your help
Hi Glenda! Thank you so much for checking out this recipe! I haven’t tried this recipe just in the oven. I find that my bread machine really makes the best gluten free bread! When using the bread machine, I don’t mix the yeast in, I just leave it in the nest ❤
Thank you for sharing this delicious recipe. Maybe I missed it somewhere, but how many pounds is this loaf? I bought the KBS bread maker thanks to you talking about it having a ceramic insert on your channel. The choices on the machine are 1, 1.5 and 2 pounds. Which one do you use when you make it? Thanks again!
Hi Emme!
Thank you so much for checking out this recipe ❤❤ I am not sure how much it weighs but it makes about 12 or 13 slices 🤗
Amazing! I’m so excited to have such a delicious bread recipe! My daughter in-law who doesn’t eat gluten free said it surpasses ANY bread recipe she’s ever made! Thank you!!!
Woohoo! That makes my day to hear that your daughter in law loved the bread so much! I hope you enjoy it too 😁❤❤
Hi Noemi!
I absolutely love your videos and look forward to them each week.
I think it is great that you can laugh at your mistakes and little mishaps, too! It makes me laugh and brightens my day!
I believe it is an important survival technique everyone should try.
Question…Have you tried this recipe without the Xanthan gum??
Hi Donna! Thank you so much for watching my channel ❤❤ I am so happy you enjoy them and my humor 😂 I agree that laughing is so important in life!
With the xanthan gum, I think you will be okay without it. It helps to hold all the gluten free ingredients together, but with the three eggs in the recipe I don’t think the xanthan gum is necessary. The bread just might not be as bouncy without the gum ❤
Hi Noemi!
My family and I really enjoy this bread recipe. It is so delicious and easy to make, thank you for sharing it with us along with your joy and wisdom each week!
I am so glad you and your family are enjoying it Lonna! 🤗🤗 Thank you for checking it out ❤🧡😀
Love love your videos. If I have made regular bread in my bread machine do you think it would be ok to make gluten free bread in the same machine?
Hi Connie 🤗 I don’t think it would work well on the regular setting. Gluten free flour acts very differently than a gluten flour one so different mixing and baking are required. I hope that helps! 💕